iCloud Music Library on iPhone with Apple Music allows you to amass a huge collection of songs without those songs taking up download space on your iPhone. But our iPhones (especially the iPhone 7) have enough storage for most music listeners to keep it local, if desired. Apple Music doesn’t currently offer a one-step solution to downloading all your songs for offline listening on your iPhone. But I have a workaround you can use with iTunes on your computer. If you’re trying to make all your music available offline in Apple Music, this will be the easiest way to do it—at least until Apple hears our cries for an easy way to download all songs at once. In the meantime, here’s how to make all your music available offline in Apple Music.
Related: How to Delete Music from Your iPhone But Not From iTunes or iCloud Music Library
Downloading your music to iPhone for offline listening is also a good way to save on cellular data. Streaming your songs also takes more battery life than listening offline. If you have the storage, it’s definitely worth downloading all your songs.
If you have a large collection, it’s going to take quite a while for them all to download. I recommend keeping your iPhone plugged in during this time and turning auto-lock off.
For this to work, you need to have iCloud Music Library enabled in iTunes on your computer and on iPhone. If you’re using Apple Music on your iPhone, iCloud Music Library should already be turned on.
How to Download All Apple Music to iPhone Using iTunes
-
Open iTunes on your computer.
-
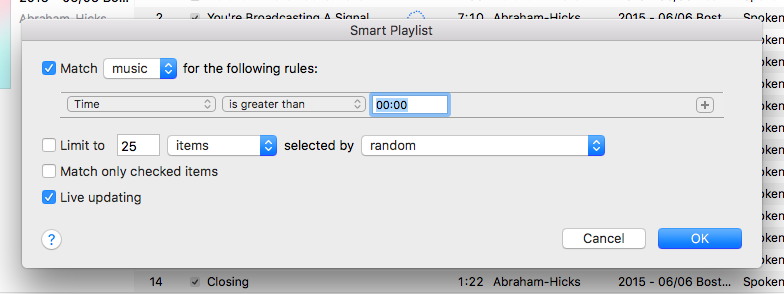
At the very top, select File, choose New, and click Smart Playlist.

Share this tip with a friend:
|


-
A box will pop up.
-
Leave Match checked and Music selected.
-
Select Time from the second drop down box and Is Greater Than in the second.
-
Type 00:00; that way all your songs will be included since they are all longer than zero seconds.
-
Make sure Limit to is unchecked.
-
Check Live Updating so that new songs added to your iCloud Music Library are downloaded too.
-
See the example below for clarification:
-
-
Give the playlist a name such as All Music.
-
Now, since you have iCloud Music Library enabled on your computer and iPhone, grab your iPhone and open the Music app.
-
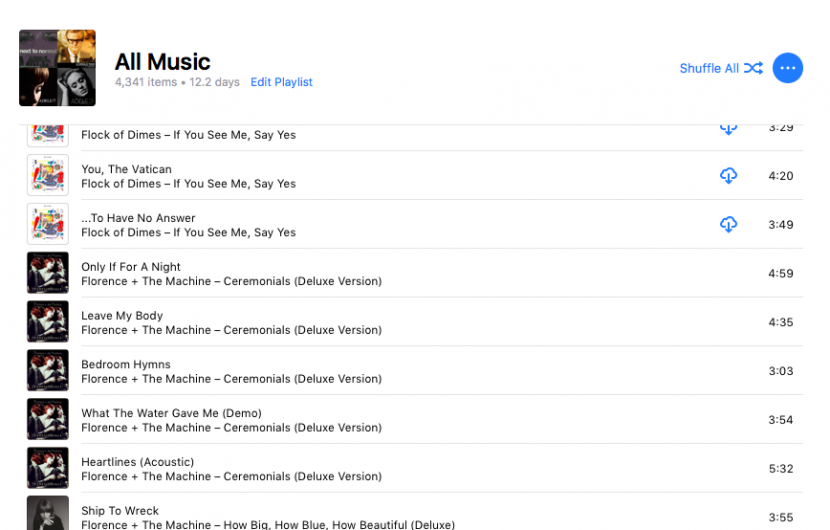
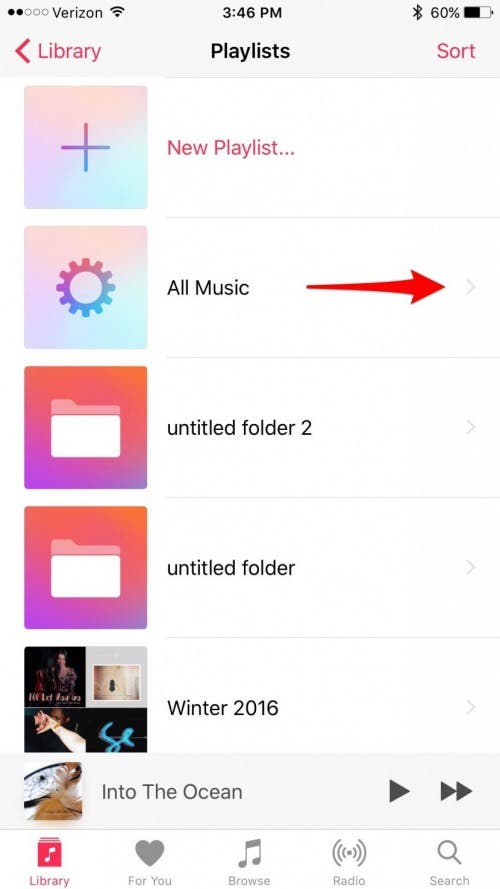
Tap My Library. Select Playlists. And choose the playlist you just created in iTunes.

-
Tap the cloud icon with a downward arrow that’s next to the album art at the top of your playlist. All of your music will begin to download.
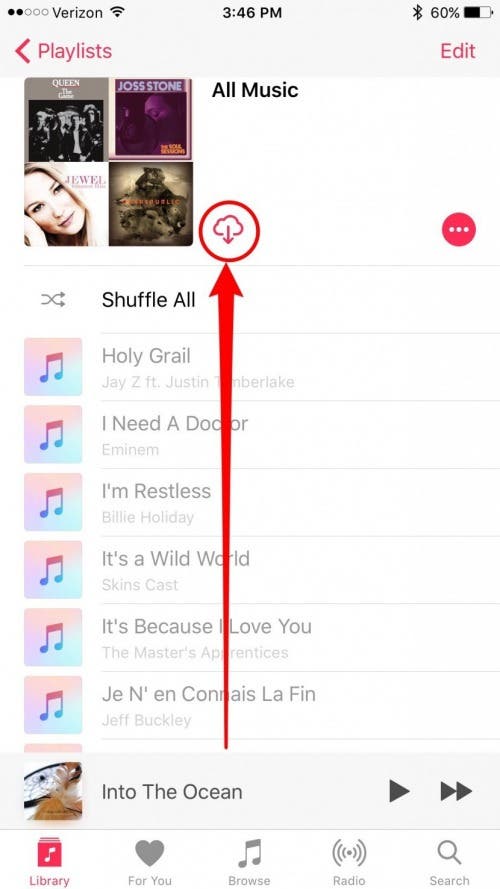
Depending on the size of your collection, this could take a while. As stated above, I recommend keeping your iPhone plugged in and turning auto-lock off while all of your music downloads.
Top Image Credit: GongTo / Shutterstock.com